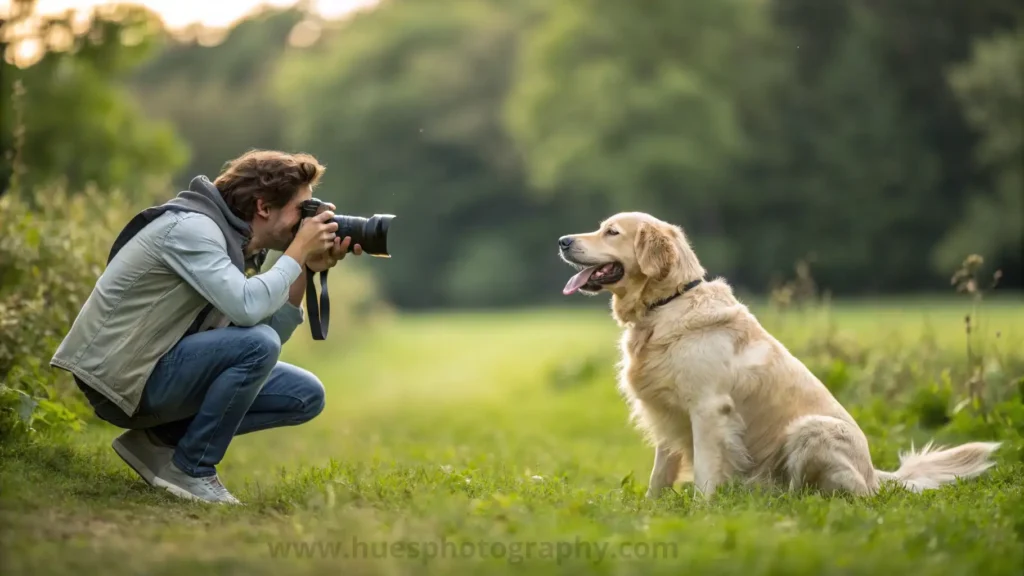
Sharp, crisp photos are the goal for many photographers. Whether you’re capturing landscapes, portraits, or fast-paced action shots, ensuring your images are tack-sharp is crucial to making them stand out. However, achieving sharpness involves more than just pointing and shooting. It combines understanding your camera, mastering focus, and paying attention to the finer details. Let’s dive into everything you need to know about taking sharp photos.
Understanding Camera Settings for Sharpness
Shutter Speed: The Key to Freezing Motion
One of the most important settings that affect sharpness is your shutter speed. Essentially, shutter speed controls how long your camera’s sensor is exposed to light, and if it’s too slow, any movement in your scene—or even slight hand movements—can cause motion blur.
Choosing the Right Shutter Speed for Different Scenarios
For still subjects, you can get away with a slower shutter speed (like 1/60th of a second), but for action shots, you’ll want something faster, like 1/500th of a second or higher. The quicker the shutter speed, the more likely you are to “freeze” motion and get a sharp image.
Why Too Slow or Too Fast Can Ruin Your Shots
While fast shutter speeds are great for freezing motion, they can result in underexposed images with enough light. On the other hand, a shutter speed that is too slow can introduce motion blur, especially if you’re shooting handheld. Finding the right balance is key.
Aperture: Finding the Sweet Spot for Maximum Detail
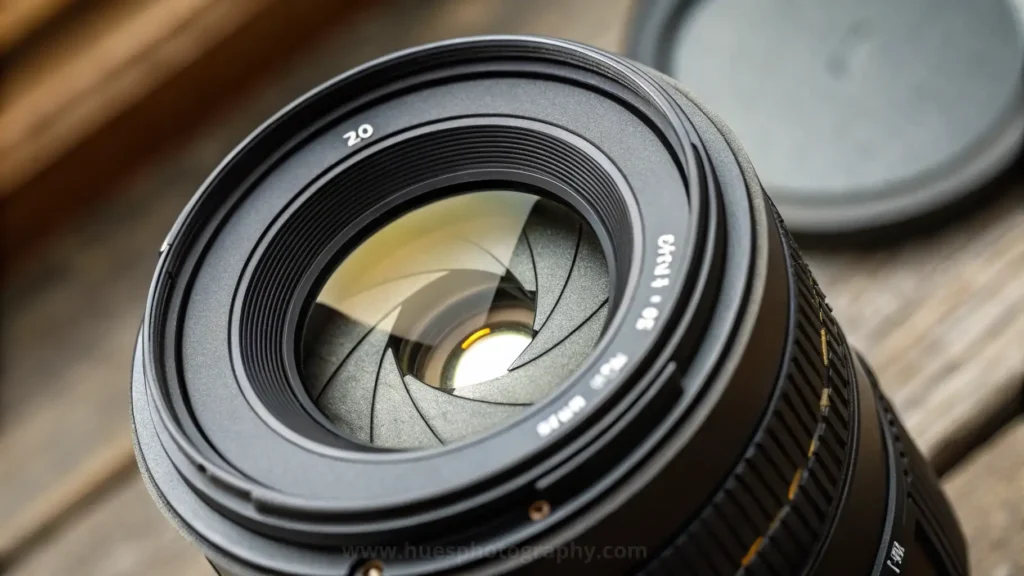
The aperture, the size of the opening in your lens, controls how much light enters your camera. It also impacts the depth of field, or how much of your image is in focus from front to back.
Understanding Depth of Field and its Role in Sharpness
A wide aperture (like f/2.8) can create a shallow depth of field, which is perfect for portraits but can leave parts of your image blurry. A smaller aperture (like f/8 or f/11) is often better for sharper images across the frame, especially in landscapes.
The “Sweet Spot” of Your Lens
Each lens has a “sweet spot,” usually between f/5.6 and f/8, where it performs best in sharpness. Experimenting with your lenses to find this can make a big difference in your photos.
ISO: Balancing Light Sensitivity Without Sacrificing Sharpness
ISO measures your camera’s sensitivity to light. A higher ISO lets you shoot in low light, but it also introduces noise—specks that reduce sharpness.
How High ISO Affects Sharpness Through Noise
Raising the ISO can help you shoot in darker conditions without needing a tripod, but it comes at the cost of added noise. This noise can make your images look grainy and less sharp.
Strategies for Minimizing ISO Without Losing Detail
To keep your ISO low, try shooting in well-lit environments, using a tripod, or opening up your aperture. If you must raise the ISO, modern cameras perform well up to 1600 or 3200 without introducing too much noise.
Using Proper Focus Techniques
Manual vs. Autofocus: When to Use Each
Many photographers wonder whether manual focus or autofocus is better for sharpness. Both options have their advantages.
Mastering Manual Focus for Precision
Manual focus gives you complete control and is ideal for situations where autofocus might struggle, like low-light conditions or when shooting through obstacles like glass. It’s beneficial for macro photography or landscapes.
Optimizing Autofocus Modes for Moving Subjects
Autofocus is quick and easy for most situations, but switching between focus modes (like single-point or continuous AF) based on your subject’s movement is essential for sharp photos.
Single-Point vs. Multi-Point Focus

Benefits of Single-Point Focus for Accuracy
When you’re aiming for ultimate precision, like in portrait photography, single-point focus allows you to select exactly where in the frame you want to focus. This can be crucial for ensuring your subject’s eyes are sharp.
Multi-Point Focus for Action Shots
On the other hand, if you’re shooting fast-moving subjects, like in sports photography, using multi-point focus helps ensure the camera tracks the subject, increasing the chance of a sharp photo.
The Role of Lenses in Sharp Photography
Prime vs. Zoom Lenses: Which Provides More Sharpness?
Understanding Prime Lenses’ Optical Superiority
Prime lenses, which have a fixed focal length, generally offer better sharpness than zoom lenses because they are optically simpler. They are great if you want tack-sharp images and don’t mind “zooming with your feet.”
Techniques for Getting the Best from Zoom Lenses
Zoom lenses, while versatile, can be slightly less sharp than prime lenses. To maximize their performance, try to avoid the extreme ends of the zoom range and stick to the lens’s middle focal lengths.
Importance of Lens Quality
How Cheap Lenses Can Affect Sharpness
Lower-quality lenses can introduce issues like chromatic aberration or lens distortion, which affect sharpness. Investing in a better lens can greatly improve your image quality.
Investing in High-Quality Glass
While high-end lenses may cost more, they often have better build quality, sharper optics, and more advanced coatings that reduce flare and ghosting, ensuring sharper photos.
Camera Handling and Stability
The Impact of Camera Shake on Sharpness
Camera shake is one of the leading reasons for blurry photos. Even slight movements while pressing the shutter can soften your image.
How to Hold Your Camera Correctly
Learning how to properly hold your camera—with both hands supporting the body and lens, elbows tucked in—can significantly reduce shake.
Benefits of Using a Tripod for Maximum Stability
Using a tripod is essential for ultimate sharpness, especially in low-light conditions or long exposures. It provides the stability needed to keep your camera still and avoid any blurriness caused by movement.
Using a Remote Shutter or Timer
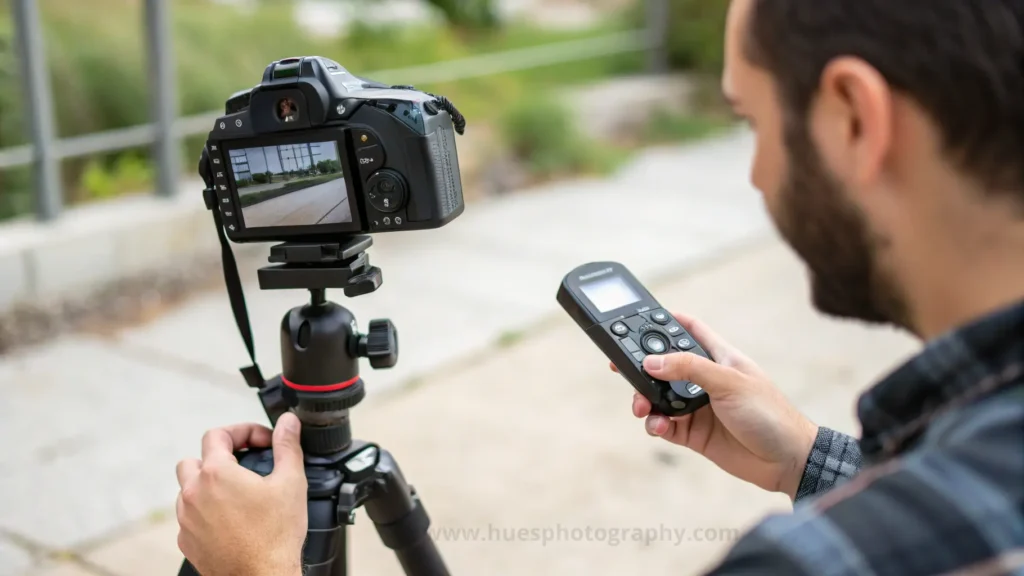
Reducing the Risk of Blurry Photos From Hand Pressing
Even pressing the shutter button can cause slight vibrations that affect sharpness. A remote shutter or setting your camera’s self-timer helps eliminate this risk.
Best Scenarios for Remote Shutter Use
Using a remote shutter or timer is ideal for long exposures, macro shots, and other scenarios where even the slightest vibration can result in a blurry image.
Post-Processing Tips for Sharpness
1. Using the Sharpening Tool Effectively
Most photo editing programs, like Adobe Lightroom, Photoshop, or Capture One, have built-in sharpening tools that allow you to enhance the fine details in your images. The key to effective sharpening is moderation—too much can introduce artifacts, noise, or a “halo” effect around the edges.
- Lightroom’s Sharpening Panel: This tool offers four main sliders—Amount, Radius, Detail, and Masking.
- Amount: Controls how much sharpening is applied. Start with a low setting (around 25-50) and gradually increase until the image looks sharp without appearing too harsh.
- Radius: This slider controls how wide the sharpening effect spreads. For fine detail work (e.g., portraits), use a small radius (0.5-1.0). A higher radius can be used for larger objects.
- Detail: This adjusts how much emphasis is placed on finer details. A higher setting enhances more intricate textures but can also increase noise.
- Masking: Masking allows you to sharpen only the edges, reducing the sharpening applied to smoother areas like the sky or skin. Holding Alt/Option while moving the slider shows a mask where sharpening will be applied.
- Photoshop’s Smart Sharpen: This tool gives you more control over sharpening and noise reduction. Start with a small amount (around 100%) and adjust the Radius and Reduce Noise sliders to avoid adding grain.
2. Focus on Edge Sharpening (Avoid Sharpening Noise)
When sharpening, focus on enhancing the edges of objects rather than applying sharpening to the entire image. Sharpening non-edge areas, like the sky or skin, can introduce unwanted grain and noise. Use edge-specific tools in programs like Smart Sharpen in Photoshop or the Detail Masking slider in Lightroom to ensure that only the edges of objects get sharpened.
3. Using Clarity and Texture for Mid-Tone Sharpness
In addition to traditional sharpening, Clarity and Texture sliders in Lightroom or Camera Raw can enhance the sharpness in the mid-tones of your image, which impacts contrast without exaggerating noise.
- Clarity enhances mid-tone contrast, which can give your image a punchy, sharp look, especially for landscapes. Use it sparingly, especially on portraits, as it can make skin textures look harsh.
- Texture is a more subtle tool that emphasizes fine details without affecting the overall contrast too much. It’s perfect for enhancing subtle textures like fabric, grass, or skin without adding too much harshness.
4. High-Pass Filter for Precision Sharpening in Photoshop
A great way to sharpen specific parts of an image in Photoshop is by using a High-Pass Filter. This technique applies sharpening only to the edges, reducing the risk of introducing noise.
- Duplicate your image layer.
- Go to Filter > Other > High Pass and set a radius between 1.0 and 2.5 pixels. This will make the edges stand out in gray while leaving the rest of the image unaffected.
- Change the layer’s blend mode to Overlay. You can reduce the opacity of the layer to fine-tune the sharpening effect.
5. Selective Sharpening Using Layer Masks
Selective sharpening allows you to apply sharpening only to specific parts of your image. This is especially useful when only certain areas need enhancement, such as the eyes in a portrait or the subject in a landscape.
- Apply sharpening to the entire image.
- Add a layer mask and paint over the areas where you don’t want sharpening (such as the background or smooth skin) with a black brush.
- Adjust the opacity of the mask for a more subtle effect, focusing the sharpness on critical areas like eyes, hair, or fine details in landscapes.
Correcting Focus Issues in Post-Production
1. Using Sharpening Tools in Post-Production
Most photo editing software like Adobe Lightroom or Photoshop has sharpening tools that can help enhance an image’s clarity. These tools work by increasing the contrast along the edges of objects in your image, making them appear sharper. Here are some key points on how to use them effectively:
- In Adobe Lightroom: The sharpening panel offers sliders such as “Amount,” “Radius,” “Detail,” and “Masking.” Start by increasing the “Amount” to boost sharpness, but be careful not to overdo it, as too much sharpening can create a “halo” effect around the edges, making the image look unnatural.
- In Photoshop: The “Unsharp Mask” and “Smart Sharpen” tools allow you to finely control the sharpening effect. Use small adjustments to avoid exaggerating noise or detail.
2. Applying Deconvolution Algorithms
Advanced software like Topaz Sharpen AI or specialized Photoshop plugins uses deconvolution algorithms to restore lost focus. This method analyzes the blurred areas and attempts to reconstruct a sharper version of the image by mathematically reversing the blur. These tools can sometimes bring slightly out-of-focus images back into acceptable sharpness.
3. Selective Sharpening
If only part of your image is soft or out of focus, selective sharpening can be a great solution. This involves using layer masks in Photoshop to apply sharpening only to specific areas, like the eyes in a portrait while leaving the background or other less critical areas untouched. This technique helps avoid over-sharpening the entire image.
4. Adjusting the Clarity and Texture
In software like Lightroom, sliders such as Clarity and Texture can be used to emphasize mid-tone contrast, which can make images appear sharper. Clarity enhances the contrast of textures and edges, while the Texture slider affects fine details like skin and fabric. Use these tools sparingly to avoid an over-processed look.
5. Reducing Motion Blur
If the issue is motion blur rather than focus, Photoshop’s “Shake Reduction” filter can sometimes help. This tool attempts to counteract small amounts of motion blur by analyzing the image’s motion path and applying corrections. While it’s not perfect, it can make slight improvements to blurry images.
Conclusion
Taking sharp photos is all about finding the right balance between camera settings, proper focus, and steady handling. By mastering your shutter speed, aperture, and ISO, and using the best focusing techniques, you can significantly improve the clarity and sharpness of your images. Don’t forget that investing in quality lenses and using stable camera handling methods will further enhance your results. With practice, achieving sharp photos becomes second nature.
FAQs
1. What shutter speed is ideal for sharp photos?
- A shutter speed of at least 1/125th of a second is generally a good starting point for handheld photography. For fast action, you’ll need 1/500th of a second or faster.
2. Can image stabilization help me take sharper photos?
- Yes, image stabilization helps counteract camera shake, especially in low-light conditions or when using slower shutter speeds.
3. How does lighting impact photo sharpness?
- Good lighting reduces the need for high ISO settings and allows for faster shutter speeds, both of which contribute to sharper photos.
4. Is manual focus better for achieving sharpness?
- Manual focus gives you greater control, especially in tricky lighting or complex scenes. However, autofocus is usually quicker and easier for most general photography.
5. What are the best editing tools for sharpening images?
- Adobe Lightroom, Photoshop, and other editing tools offer sharpening sliders that help enhance image details without overdoing it.
6. How can I ensure sharpness when shooting handheld?
- To achieve sharp handheld photos, use a faster shutter speed (at least 1/125th of a second), practice proper camera holding techniques, and consider turning on image stabilization if your camera or lens has it.
7. Do filters affect the sharpness of my photos?
- Yes, filters, especially lower-quality ones, can reduce sharpness by introducing unwanted reflections or distortion. Always invest in high-quality filters, or consider shooting without them unless necessary.
8. What’s the best autofocus mode for sharp photos of moving subjects?
- Continuous Autofocus (AF-C or AI-Servo) is best for capturing moving subjects. This mode adjusts the focus in real-time, tracking the subject as it moves, helping to maintain sharpness throughout the shot.
9. How can I improve sharpness in low-light conditions?
- In low-light conditions, use a tripod to eliminate camera shake, lower your shutter speed, increase ISO only as necessary, and use a wider aperture to allow more light in without sacrificing sharpness.
10. Does sensor size affect photo sharpness?
- Yes, larger sensors, like those in full-frame cameras, typically produce sharper, higher-quality images because they capture more detail and perform better in low-light conditions. However, even smaller sensors can deliver sharp photos with proper technique.